How to Polish Steel and Stainless Steel with a Pro-Max Professional bench grinder metal polishing kit.
Joseph Waggott
Steel and stainless steel polishing can transform dull, scratched surfaces into brilliant, mirror-like finishes that rival professional results. Whether you're restoring automotive parts, marine hardware, or architectural components, our Pro-Max professional bench grinder metal polishing kits provide everything needed to achieve exceptional results from your workshop.
Why Choose Bench Grinder Polishing for Steel and Stainless Steel?
Bench grinder polishing offers several advantages over handheld methods:
- Consistent speed and power for uniform results
- Hands-free operation allowing better control of workpieces
- Professional-grade performance suitable for larger components
- Versatile setup that can handle various steel thicknesses and shapes
Our Pro-Max bench grinder kits are specifically designed for steel and stainless steel polishing, incorporating our proven three-stage methodology that delivers professional results every time.
What You'll Need
- A bench grinder with either 1/2" - 12.7mm or 5/8" - 16mm main shafts that runs at a minimum speed of 2950 rpm.
- Please note that the following size machines can only use the maximum size polishing wheels as shown below:
| Motor Power | Maximum Polishing Wheel Size |
|---|---|
| 120W | 3" x 1" |
| 150W | 4" x 1/2" |
| 250W | 6" x 1/2" |
| 370W | 6" x 1" |
| 550W + | 8" x 1" |
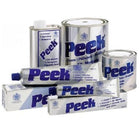
Pro-Max Bench Grinder Metal Polishing Kit includes:
- Left and right hand spindle adaptors
- Three-stage buffing wheel system:
- Sisal wheel for initial cutting
- Colour stitch wheel for intermediate polishing
- 'G' loose fold wheel for final finishing
- Complete compound collection (Brown, Blue, Black, Green, White)
- Microfibre cloth and comprehensive polishing guide
Essential Safety Equipment:
- Dust mask
- Safety spectacles
- Protective gloves
- Well-ventilated workspace
Critical Workpiece Preparation - The Foundation of Professional Results
Proper preparation is absolutely essential for achieving mirror-bright finishes. No amount of polishing can compensate for inadequate preparation work.
Initial Assessment and Cleaning
Step 1: Thorough Surface Inspection
- Examine your steel or stainless steel workpiece under good lighting to identify all scratches, oxidation, and surface defects
- Mark heavily damaged areas that may require additional attention
- Check for any existing coatings, lacquers, or protective films that must be removed
Step 2: Complete Surface Cleaning
- Remove all dirt, oil, grease, and contaminants using a suitable degreasing agent
- For automotive parts, remove any road grime, brake dust, or accumulated debris
- Marine components require removal of salt deposits and corrosion products
- Dry thoroughly with clean, lint-free cloths
Removing Existing Coatings and Oxidation
Lacquer and Coating Removal:
- Use appropriate paint remover or chemical stripper for any existing lacquers
- Follow manufacturer's safety instructions and work in well-ventilated areas
- Remove all traces of old coatings as they will interfere with the polishing process
- Clean residual stripper thoroughly with recommended solvents
Oxidation and Rust Treatment:
- Light surface oxidation can often be addressed during the polishing process
- Heavy oxidation or rust may require pre-treatment with steel-specific cleaners or rust removers
- For severe cases, consider light abrasive treatment before beginning the polishing stages
- Ensure complete removal of all oxidation products before proceeding
Pre-Polishing Scratch Assessment and Treatment
Scratch Classification:
- Light scratches: Can be removed during Stage 1 polishing
- Medium scratches: May require extended Stage 1 treatment
- Deep scratches: Require preliminary abrasive treatment
Heavy Scratch Pre-Treatment:
- For deep scratches, begin with 320-400 grit wet sandpaper
- Work systematically across the surface, ensuring uniform scratch pattern
- Progress through 600, 800, and 1000 grit papers for severely damaged pieces
- Always sand in consistent directions to create uniform scratch patterns
- Clean thoroughly between each grit change to prevent contamination
Surface Uniformity Check:
- After preparation, the surface should show uniform, fine scratches
- No deep gouges, pitting, or irregular damage should remain
- The surface should be completely clean and free from all contaminants
Final Preparation Steps
Degreasing and Final Clean:
- Use a high-quality degreasing agent to remove any remaining oils or fingerprints
- Wipe with clean, lint-free cloths
- Avoid touching the prepared surface with bare hands
Workspace Setup:
- Ensure adequate lighting to monitor progress throughout polishing
- Position workpiece for safe, comfortable access during all polishing stages
- Have all required compounds and wheels readily accessible
- Verify all safety equipment is in place and functioning
Quality Control Check:
- The prepared surface should be uniformly scratched with fine abrasive marks
- No deep scratches, oxidation, or contamination should remain
- Surface should be completely dry and ready for Stage 1 polishing
The Three-Stage Steel and Stainless Steel Polishing Process
Stage 1: Initial Cutting and Scratch Removal
Setup:
- Secure the left or right hand spindle adaptor to your bench grinder
- Mount the sisal polishing wheel and tighten securely
- Start the machine and allow it to reach full speed (2,950 RPM)
Technique:
- Apply Pro-Max black polishing compound to the spinning sisal wheel for approximately 2 seconds
- Present your steel or stainless steel workpiece to the wheel area rotating away from you
- Use medium to firm pressure (steel often requires more pressure than softer metals)
- Continue until all scratches and marks are completely removed
- The surface should have a uniform, dull finish when this stage is complete
Pro Tip: Steel and stainless steel often require more pressure during the initial cutting stage due to their hardness. Take your time to ensure all imperfections are removed, as this foundation determines your final result quality.
Stage 2: Intermediate Polishing
Wheel Change:
- Stop the machine and replace the sisal wheel with the colour stitch polishing wheel
- Ensure secure mounting before restarting
Polishing Process:
- Apply the appropriate Pro-Max green compound to the spinning colour stitch wheel for approximately 2 seconds
- Use soft to medium pressure, presenting the workpiece to the wheel
- This stage transforms the dull finish into a semi-bright, uniform surface
- Continue until you achieve consistent semi-bright finish across the entire piece
Stage 3: Final Mirror Finishing
Final Setup:
- Replace the colour stitch wheel with the 'G' loose fold buffing wheel
- Apply Pro-Max white compound to the wheel
Achieving Mirror Finish:
- Use light to medium pressure for this delicate final stage
- The semi-bright finish will transform into a brilliant, mirror-like surface
- Work systematically across the entire piece
- Apply additional compound as needed, but sparingly
Finishing Touch: Use the provided microfibre cloth to remove any excess compound and reveal the perfect mirror finish.
Professional Tips for Steel and Stainless Steel Polishing Success
Technique Mastery:
- Always polish across scratches rather than along them
- Vary your polishing directions constantly
- Apply compound frequently in small amounts rather than large applications
- Maintain consistent pressure throughout each stage
- Steel requires more initial pressure than softer metals
Common Steel and Stainless Steel Challenges:
- Black grease marks: Indicates too much compound - remove with dry microfibre cloth
- Uneven finish: Usually requires more time with the initial cutting wheel
- Water spots on stainless steel: Focus on removing during Stage 2
- Directional scratches: Can create attractive patterns on stainless steel if desired
Wheel Maintenance:
- Use different wheels for different compounds
- Clean wheels with a wire brush when changing compounds
- Store wheels in a clean, dry environment
Safety Considerations for Bench Grinder Polishing
Essential Safety Practices:
- Always wear complete safety equipment
- Maintain firm grip on workpieces to prevent them being pulled away
- Work in well-ventilated areas
- Never exceed 20-25 minutes continuous operation, allow your bench grinder to cool down
- Ensure all wheels are securely mounted before starting
Proper Workpiece Presentation:
- Always present work to the wheel area rotating away from you
- Keep steady, controlled movements
- Never force the workpiece against the wheel
Protecting Your Polished Steel and Stainless Steel
Once you've achieved that perfect mirror finish:
- Immediate Protection: Remove all polishing residue with a clean microfibre cloth
- Long-term Protection: Apply a quality wax polish to prevent oxidation (especially important for carbon steel)
- Maintenance: Regular light buffing will maintain the finish
Important: If you plan to apply coatings or treatments, use a proper degreaser and avoid wax application, as any residue will interfere with coating adhesion.
Why Pro-Max Kits Excel for Steel and Stainless Steel
Our Pro-Max professional bench grinder kits are specifically engineered for steel and stainless steel polishing success:
- Complete System: Everything needed for our proven three-stage process
- Quality Components: Professional-grade wheels and compounds designed for consistent results on harder metals
- Expert Support: Comprehensive guides and technical assistance available
Troubleshooting Common Issues
Problem: Scratches remain after Stage 1
Solution: Spend more time with the sisal wheel and brown compound, applying firmer pressure
Solution: Spend more time with the sisal wheel and brown compound, applying firmer pressure
Problem: Uneven brightness in final finish
Solution: Ensure complete coverage in Stage 2 before proceeding to final polishing
Solution: Ensure complete coverage in Stage 2 before proceeding to final polishing
Problem: Compound buildup on workpiece
Solution: Use less compound and clean wheels regularly with a wire brush
Solution: Use less compound and clean wheels regularly with a wire brush
Getting Started with Your Pro-Max Kit
Ready to achieve professional steel and stainless steel polishing results? Our Pro-Max bench grinder metal polishing kits provide everything needed to transform your steel components into mirror-bright masterpieces.
Free UK Delivery on orders over £45 - EU orders welcome
Transform your workshop capabilities today with Pro-Max professional metal polishing systems - trusted by professionals and serious DIY enthusiasts across the UK.
This guide incorporates our proven three-stage polishing methodology, developed through years of professional experience and customer feedback. For additional metal-specific guides and product selection assistance, visit our complete resource centre online.