A Beginner’s Guide to Metal Polishing Using Our Kits
Get a professional mirror finish at home—no experience required.

Metal polishing might look complicated, but with the right tools and a little guidance, anyone can turn dull, scratched, or tarnished metal into a bright, reflective, showroom-quality finish. Whether you're restoring car or motorcycle parts, cleaning up old brass and copper, or shining stainless steel, our polishing kits make the job simple—even for complete beginners.
In this guide, we’ll walk you through:
✅ What metal polishing is
✅ What tools you need
✅ How to polish metal step-by-step
✅ Top tips for the best results
What Is Metal Polishing?
[Insert image: Polished metal surface under workshop lights]
Metal polishing removes scratches, marks, tarnish and oxidation using buffing wheels and polishing compounds. Each polishing stage becomes finer until the surface becomes smooth and mirror-bright.
It’s widely used for:
-
Automotive & motorcycle restoration
-
Jewellery & silverware
-
Household appliances and antiques
-
Marine and engineering parts
Our kits are designed to work with drills, bench grinders, and angle grinders, meaning you don’t need expensive machinery to achieve a professional result.
✅ What You’ll Need
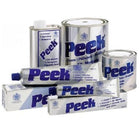
All of our polishing kits include:
✔ Polishing wheels (Sisal, Colour/White Stitch, Loose Fold / Swansdown)
✔ Matching polishing compounds
✔ Mandrels and adaptors
✔ Microfibre finishing cloth
[Insert image: Polishing kit contents laid out neatly]
✅ Step-By-Step Metal Polishing Guide
(If you are polishing softer metals or chrome, start at Step 7.)
[Insert Step-by-Step Collage Image – Wheels, Compounds, Before/After]
Step 1 — Fit the Mandrel or Adaptor
Attach the tapered mandrel to a drill, or the adaptor to your bench/angle grinder, and tighten securely.
Step 2 — Add the Sisal Cutting Wheel
This first wheel removes heavy marks and scratches.
Step 3 — Charge the Wheel with Compound
Run the machine and apply the relevant compound for around 2 seconds.
➡ The heat melts compound into the wheel
➡ The abrasive begins cutting the metal smoothly
Step 4 — Cut & Smooth
Apply the wheel to the metal using medium pressure.
Continue until:
✔ All scratches are removed
✔ The surface has a uniform dull finish
Step 5 — Move to the Colour or White-Stitch Wheel
This stage creates a semi-bright finish.
Step 6 — Finish with Loose Fold or Swansdown
This last buffing stage brings out the mirror shine.
Step 7 — Final Wipe-Down
Use the microfibre cloth to remove leftover residue, compound or grease.
✅ Top Tips for Perfect Results
[Insert image: person polishing with safety mask & glasses]
✔ Use compound sparingly—little and often
✔ Always use a different wheel for each compound
✔ If the metal is lacquered, remove lacquer before polishing
✔ Black marks wipe away easily with a dry microfibre cloth
✔ For small parts, clamp the drill in a vice for control
✔ Vienna Lime can remove haze or fingerprints
✔ Protect finished metal with a good wax
✔ Wear safety glasses, gloves, and a dust mask
✅ Safety First
-
Wear protective gear
-
Keep loose clothing and hair away from rotating wheels
-
Always polish on the side of the mop rotating away from you
✅ The Results Speak for Themselves
[Insert Before & After Gallery]
What looks scratched, faded or rusty can be restored to a deep mirror shine in minutes.
Want to Get Started?
Browse our polishing kits:
🔧 Drill Polishing Kits
🔧 Bench Grinder Kits
🔧 Angle Grinder Kits
All include the right wheels, compounds, and instructions to help beginners get professional results.